How to Get an Authentic Film Look with Your Digital Travel Photos
You know that feeling when you’re scrolling through your travel photos and something just feels… off? The images are sharp, the colors are bright, but they lack that certain something. Meanwhile, you stumble across a vintage postcard or an old travel magazine spread, and those images, despite being decades old, somehow feel more alive, more romantic, more real.
That’s the magic of film photography. And the good news? You don’t need to buy an old film camera or spend a fortune on developing rolls to capture that timeless aesthetic. With the right tools, you can transform your digital travel photos into images that evoke the warmth and nostalgia of classic film, all from the comfort of your laptop.
Digital vs. Film: What Makes Them Different?
Before we dive into how to achieve the film look, let’s talk about what makes film and digital photography look so different in the first place.
The Digital Look
Modern digital cameras are incredible pieces of technology. They capture images with razor-sharp precision, rendering every detail exactly as the sensor sees it. This is fantastic for technical accuracy, but it can sometimes result in photos that feel a bit too perfect, too clinical. Digital photos often have very clean shadows, bright highlights that can look harsh, and colors that are processed in a very literal way.
The Film Look
Film photography, on the other hand, has an organic quality that comes from the chemical process of capturing light on film. Here’s what makes it distinctive:
- Film grain: Those tiny speckles you see in film photos are texture that adds depth and character
- Color rendering: Film stocks process colors differently than digital sensors, often creating warmer, more nuanced tones with less harshness
- Gentle highlights: Instead of blowing out to pure white, film highlights tend to “bloom” softly, retaining subtle detail and color
- Imperfections: Slight color shifts, vignetting, and variations from frame to frame add authenticity
When you look at a film photograph, your eye feels a mood. That’s the difference we’re after.
Why Give Your Travel Photos a Film Look?
You might be wondering, “If I have a perfectly good digital camera, why would I want to make my photos look like they were shot on old technology?” Great question. Here’s why the film aesthetic works so beautifully for travel photography.
It Tells an Emotional Story
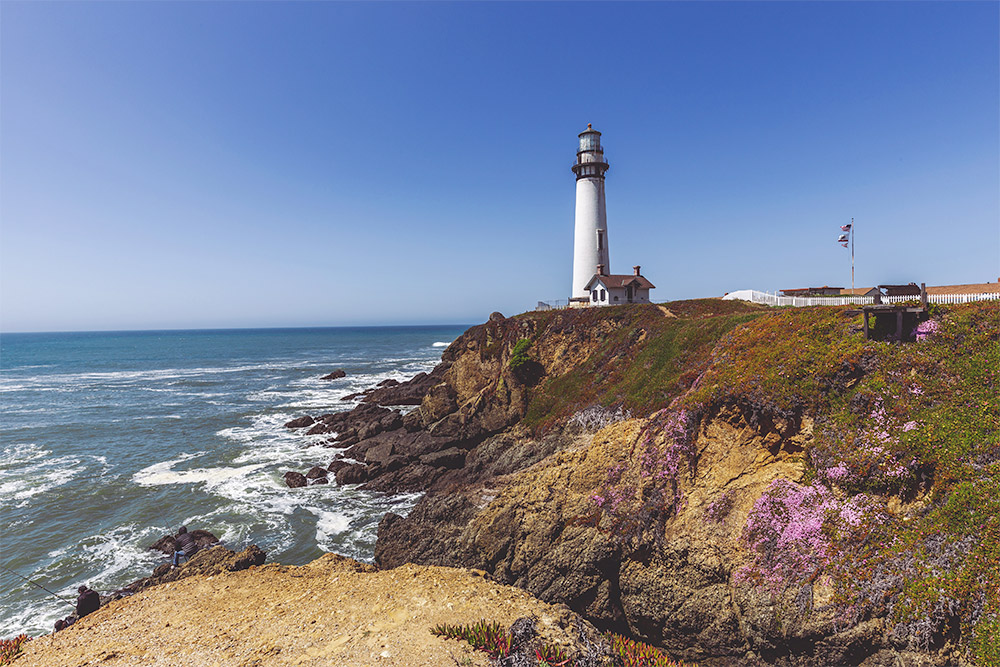
Travel is about experiences and feelings: the warmth of golden hour in Santorini, the romance of Parisian cafés, the adventure of hiking through Patagonia. The film look naturally evokes nostalgia and emotion, helping your images convey not just what you saw, but how it felt to be there.
Your Photos Will Stand Out
Social media is saturated with hyper-sharp, heavily filtered digital photos. The film aesthetic offers something different. It’s a softer, more sophisticated look that catches the eye precisely because it doesn’t try so hard.
Timeless Quality
Digital trends come and go, but film aesthetics have looked good for decades and will continue to look good for decades more. Your travel photos won’t feel dated in ten years.
Forgiving by Nature
Here’s a secret: the film look can actually make you look like a better photographer. Film grain disguises digital noise. Softer highlights hide blown-out skies. The organic nature of film characteristics makes minor technical imperfections less noticeable, while the overall mood becomes more prominent.
Creates a Cohesive Collection
When you apply consistent film aesthetics across your travel album, you create a unified visual story. Instead of a mishmash of different looks from different days and lighting conditions, your photos feel like they belong together, like pages from the same adventure journal.

Enter Psdfilm: Film Emulation Made Easy
So how do you achieve this film look without actually shooting film? This is where the Psdfilm Photoshop actions come in.
Photoshop actions are recorded sets of editing steps that you can apply to your photos with a single click. Think of them like a recipe. Instead of manually adjusting dozens of settings every time you want to make chocolate chip cookies, you follow the same proven recipe that gives you consistent, delicious results.
Psdfilm creates actions that authentically emulate classic film stocks, those specific types of film that photographers have loved for generations. What makes Psdfilm actions special?
- Authentic emulations: These aren’t generic “vintage” filters. They’re carefully crafted to replicate the specific characteristics of real film stocks like Kodak Portra, Fuji Pro, and classic black-and-white films.
- Non-destructive workflow: The actions work with layers, meaning you can always adjust the intensity or undo the effect completely without harming your original photo.
- Beginner-friendly: You don’t need to understand color theory or advanced Photoshop techniques.
- Affordable: Compared to actually shooting film (which requires buying film, paying for development, and scanning), Psdfilm actions are a small one-time investment.
How to Use the Psdfilm Actions
Ready to transform your travel photos? Let’s walk through the process together.
What You’ll Need
- Adobe Photoshop: If you don’t already have Photoshop, Adobe offers a free trial.
- Psdfilm actions: Choose and download your desired film emulation pack from the Psdfilm website. The Mega Bundle includes all of their actions for just $39. And if you just want to check it out, try this free sample.
- Your digital travel photo: Works with both RAW and JPEG files, though RAW gives you more flexibility.
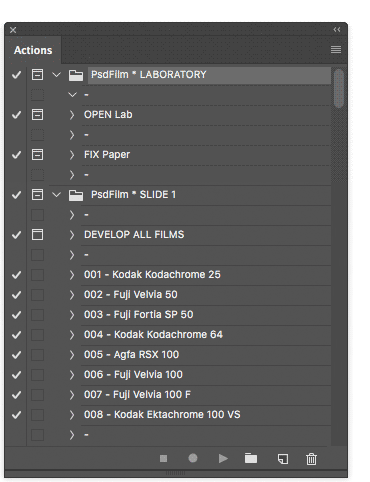
Installation: Getting Started
Before you can use any Photoshop action, you need to load it into the program. To install the actions, simply double click the .atn file you downloaded from Psdfilm. To make sure they were installed correctly, go to Windows > Actions, and you should see the Psdfilm actions listed in the Actions Panel, as shown below.
Applying the Film Look: The Fun Part
Now let’s actually transform a photo. I’ll walk you through each step.
Step 1: Prepare Your Photo
Open your travel photo in Photoshop (File > Open). Before applying any film emulation, take care of the basics:
- Straighten the horizon if needed (Crop tool, with “Straighten” option)
- Crop to improve composition
- Adjust exposure if the photo is significantly too dark or too bright (Image > Adjustments > Levels, or use Camera Raw Filter)
A word of advice: Film emulations work best when applied to a well-exposed, properly composed photo. They enhance good photography; they don’t fix poor photography. Start with the best possible base image.
Step 2: Select Your Film Emulation
Now comes the exciting part. Look at your Actions panel where you loaded your Psdfilm actions. You’ll see a list of film stock names. Click once on your chosen action name to select it.
Step 3: Run the Action
This is where the magic happens. At the bottom of the Actions panel, you’ll see a row of icons. Click the “Play” button (it’s a triangle pointing right, like a play button on any media player).
Now sit back for a moment. Photoshop will start working, automatically applying a series of adjustments. You’ll see the Layers panel populate with multiple layers, each contributing to the final film look. Depending on your computer speed and image size, this might take anywhere from a few seconds to half a minute.
Step 4: Fine-Tune the Effect
Here’s where you make the look your own. When the action finishes running, check your Layers panel (Window > Layers if you don’t see it). You’ll notice several new layers above your original photo.
The beauty of Psdfilm actions is that they’re non-destructive, giving you complete control over the final result. Here’s how to adjust:
- Adjust overall intensity: Look for the topmost layer or layer group. See that “Opacity” slider at the top of the Layers panel? This is your intensity control.
- 100% opacity = full film effect (sometimes this can be too strong)
- 70-80% opacity = pronounced film look, perfect for making a statement
- 50-60% opacity = subtle, natural film aesthetic (my personal sweet spot)
- 30-40% opacity = just a whisper of film character
Play with this slider while watching your image. There’s no “correct” setting—it depends on your photo and your taste.
- Toggle layers on and off: Click the eye icon next to any layer to temporarily hide it. This lets you see what each layer contributes. If you don’t like a particular effect (maybe the grain is too strong for your taste), you can simply delete that layer or reduce its opacity individually.
Step 5: Save Your Work
Save your file properly:
- Save as PSD: Go to File > Save As and choose “Photoshop” format (.psd). This preserves all your layers, allowing you to return later and adjust the opacity or make other changes
- Export for sharing: When you’re ready to post online, flatten the image (Layer > Flatten Image) and export as JPEG (File > Export > Export As, choosing JPEG with quality around 80-90%)
Your Photos, Elevated
Travel photography is about more than just documenting where you’ve been. It’s about preserving how those places made you feel, sharing the wonder and beauty you experienced, and inviting others into your adventures. The film look, with its warmth, texture, and timeless quality, helps bridge the gap between the clinical precision of digital cameras and the emotional truth of your memories.
With Psdfilm actions, achieving this aesthetic doesn’t require years of Photoshop expertise or expensive software subscriptions. It requires only a willingness to experiment, an eye for which moods suit which photos, and the patience to fine-tune your results.
My challenge to you: Choose one favorite photo from your last trip. Maybe it’s a shot that’s technically fine but feels a bit flat. Load up Photoshop, apply a Psdfilm action, and watch it transform. Adjust the opacity until it feels just right. Compare the before and after.
The world is full of incredible places waiting to be photographed. With these tools in your creative toolkit, you’re ready to capture them not just as they appear, but as they feel. Now grab that camera, book that flight, and create some images that will look just as beautiful decades from now as they do today.
This page may include affiliate links or sponsored links. If you click on one of our affiliate links and complete a purchase, we may earn a commission at no extra cost to you.